Mocks, stubs, and injections: unit testing in Angular.JS
Unit testing in Angular is one of the framework’s biggest draws, and the framework’s huge focus on dependency injection makes it an ideal candidate for unit tests. This is very powerful when writing tests because any dependencies that your units or modules have can be easily mocked or injected, whether they are Angular modules or your own defined controllers, factories and directives.
I found that although this sounds good on paper, it can be quite difficult to achieve in a project whose build workflow involves about 12–15 gulp tasks, ~30 bower dependencies, and all of the modules written in ES6. Finding a way to compile the source files using Traceur and then loading them alongside the bower dependencies was a challenging endeavour, and this article aims to cover what I have found to be an ideal setup for unit testing a dependency-heavy Angular application using ES6 modules. This article will be quite lengthy, so feel free to skip ahead at any point.
The entire source code for the article is located on my GitHub at https://github.com/martin-brennan/ngtest.
The structure of this article is as follows:
- Test Runner & Syntax
- Karma Config
- ES6 Compiling With Karma
- Loading Modules Using SystemJS
- Writing Specs, Dependency Injection & Angular Mocks
- Stubbing and Spying with Sinon
- Stubbing Promises Using sinon-as-promised
- Bonus: Code Coverage Using Karma-Coverage
1. Test Runner & Syntax
The test runner that we are going to use is Karma, which was built by Google to improve test running times and which is specifically suited to testing Angular applications. It also makes it a lot easier for you to run tests on many different browsers at once. Karma is responsible for loading all of your source files, test files, and dependencies and running them in a browser-based test client. There are several different framework plugins that can be used with Karma, that do things like vary the test output, load modules differently, use different test libraries, use different browsers or compile ES6 source files.
Karma is just the test runner, we still need a testing framework to write our unit tests in. The main JavaScript testing libraries are a combination of Mocha and Chai, Jasmine, and QUnit. It doesn’t really matter which library you choose to work with, as their syntaxes and assertions are very similar and all of them can be extended in similar ways. However, I’ve found Mocha paired with Chai, which is an assertion library, to be great to work with, and that combination is what I’ll be using in this article.
2. Karma Config
To use Karma, you need a configuration file to handle source and test file loading, which port to run Karma on, and any pre-compilation that needs to happen before the tests are run. The way my Karma configuration works has been cribbed from multiple sources, the most important being the configuration found in the angular GitHub repo. Here is the test file as a whole:
1
2
3
4
5
6
7
8
9
10
11
12
13
14
15
16
17
18
19
20
21
22
23
24
25
26
27
28
29
30
31
32
33
34
35
36
37
38
39
40
41
42
43
44
45
46
47
48
49
50
51
52
53
54
55
56
57
58
59
60
61
62
63
64
65
66
var utils = require('./karma-utils');

var karmaConfig = {
  basePath: '',

  frameworks: ['mocha', 'chai'],

  plugins: ['karma-mocha',
            'karma-chai',
            'karma-sinon-chai',
            'karma-sinon',
            'karma-traceur-preprocessor',
            'karma-mocha-reporter',
            'karma-coverage'],

  reporters: ['mocha', 'coverage'],

  files: [
    'karma-utils.js',
    {pattern: 'src/**/*.js', included: false},
    'bower_components/traceur/traceur.min.js',
    'bower_components/es6-module-loader/dist/es6-module-loader-sans-promises.js',
    {pattern: 'bower_components/es6-module-loader/dist/es6-module-loader-sans-promises.js.map', included: false},
    'bower_components/system.js/dist/system.src.js',
    'bower_components/angular/angular.js',
    'bower_components/angular-mocks/angular-mocks.js',
    'bower_components/lodash/lodash.min.js',
    'node_modules/sinon/pkg/sinon-1.13.0.js',
    'bower_components/sinon-as-promised/release/sinon-as-promised.js',
    'karma-main.js'
  ],

  preprocessors: {
    'src/**/*.js': ['traceur'],
    'src/**/!(*spec)/*.js': ['coverage']
  },

  port: 9876,

  colors: true,

  traceurPreprocessor: {
    options: {
      outputLanguage: 'es5',
      sourceMaps: true,
      script: false,
      memberVariables: true,
      modules: 'instantiate',
      annotations: true
    },
    resolveModuleName: utils.file2moduleName
  },

  autoWatch: true,

  browsers: ['Chrome'],

  singleRun: false
};


// set up the actual configuration
module.exports = function (config) {
  karmaConfig.logLevel = config.LOG_INFO;
  config.set(karmaConfig);
}
As you can see, first of all we are telling Karma that we want to use Mocha and Chai as testing frameworks, and Sinon as the stubbing and spying framework (more on that later). The Karma tests are run on port 9867 and we’ve set runOnce to false, to avoid having to restart the tests every time a change is made. We’ve also set up autoWatch to true, which will monitor test and source files for changes then re-run the tests every time.
Finally, we have the files array, and the Traceur configuration (see the ES6 Compiling With Karma section below for more details). The files array tells Karma which files to load as tests, which files to load in the browser window, and which files to copy to the output directory but not load in the browser. This section is quite tricky to get right at first, because you want some files to be loaded by the browser and some, in the case of ES6 files, to be loaded by a module loader like SystemJS or RequireJS.
We also have a karma-main.js file, which is used to load spec files using SystemJS, while all other files are loaded as regular script tags in the browser. This step is essential because if you did not filter only these files, SystemJS would try and load all of your dependencies, which is not at all ideal for the majority of libraries and applications. Your specs should just import the modules they need as necessary, as loading hundreds of source files at once can be very slow.
3. ES6 Compiling with Traceur
This entire step can be skipped if you are not using ES6 for your tests and source files, but as ES6 becomes the norm you really should be using the new syntax. This step uses the karma-traceur-preprocessor to run all of the specified files, in our case all source files including specs, through a compiler to convert to ES5 before loading them in a browser window. I had tried to do this separately from Karma in the main build, but I found that everything works a lot smoother if you just let Karma handle the process, then load the files using karma-main.js.
For this project, and for my real-world project, I have source and spec files loacated alongside each other, so all of them will be precompiled with the Traceur preprocessor.
4. Loading Modules Using SystemJS
SystemJS is another module loader that can be used with ES6 modules, and is a great solution The description from GitHub for SystemJS is:
Universal dynamic module loader – loads ES6 modules, AMD, CommonJS and global scripts in the browser and NodeJS. Works with both Traceur and Babel.
As I wrote earlier, all of the spec files that have been run through the ES6 compiler by Karma should be loaded using SystemJS in the karma-main.js file. This way, the source files are loaded correctly, the spec files are loaded with SystemJS and the other dependencies can be loaded as normal.
You will notice in the file that I set up a baseURL directory of /base/src/app for SystemJS. This can be whatever directory your spec files are located, and the /base/ part at the front is simply where Karma places its files after compilation. This will let you import modules relative to this base path in your specs. For example, if your base is /base/src/app and you want to load a module from /app/people/personModel.js, you would just import relative to the base URL in your spec file:
1
import Person from 'people/personModel';
Finally, you will note the filter only loads files ending with _spec.js, which can of course be changed to however you want to name your test files. Also not pictured in karma-main.js is the file2modulename() method, which is shown below and used to strip the baseUrl path from any module names so they are loaded in the correct way:
1
2
3
4
5
6
7
8
9
function file2moduleName(filePath) {
  return filePath.replace(/\\/g, '/')

    // relative to specified baseurl
    .replace(/.*\/src\/app\//, '')

    // module name should not have a suffix
    .replace(/\.\w*$/, '');
}
Now that you have your specs loading, lets look at what the spec files themselves look like.
5. Setting Up Specs, Dependency Injection & Angular Mocks
Let’s look at what testing a simple controller looks like, where we will inject the required dependencies, mock some of our own dependencies and mock out a factory specifically for the test. We will use the example of a PersonController. Here is what the controller looks like:
1
2
3
4
5
6
7
8
9
10
11
12
13
14
15
16
17
18
19
20
21
22
23
24
25
26
27
28
29
class PersonController {
  constructor($q, PersonFactory) {
    this.$q = $q;
    this.person = new PersonFactory({
        id: 1
    });
    this.PersonFactory = PersonFactory;
  }

  loadPerson() {
    this.person.get().then((result) => {
      this.person.fullName = this.setFullName(result.firstName, result.lastName);
    });
  }

  loadPersonHistory() {
    let deferred = this.$q.defer();
    this.person.loadHistory().then((history) => {
      deferred.resolve(history);
    });
    return deferred.promise;
  }

  setFullName(firstName, lastName) {
    return firstName + ' ' + lastName;
  }
}

export default PersonController;
Here you can see that we need to mock out the PersonFactory so we don’t have API calls firing during our tests, and also because that component needs to be independently tested anyway. We also need Angular’s $q module for promises. Here is what the dependency injection and pre-test setup might look like. As you can see I’m using ES6 syntax in my tests.
1
2
3
4
5
6
7
8
9
10
11
12
13
14
15
16
17
18
19
20
21
22
23
24
25
26
27
28
29
30
31
32
33
34
35
36
37
38
39
40
41
42
43
44
45
46
47
48
49
50
51
52
53
54
55
56
57
58
59
60
61
62
63
64
import PersonController from 'person/personController';

describe('PersonController', () => {

  // set your global test vars here.
  var $q,
      $timeout,
      PersonFactory,
      MockPersonFactory,
      controller;

  // set up the person factory mock
  beforeEach(() => {
      MockPersonFactory = function () {
         return function(data) {
            return {
               get: sinon.stub().resolves({
                firstName: 'John',
                lastName: 'Smith'
               }),
               loadHistory: sinon.stub().resolves([{
                id: 1,
                text: 'John logged in.'
               },
               {
                id: 2,
                text: 'John added a task.'
               }]),
               id: data.id,
               firstName: null,
               lastName: null,
               fullName: null
            }
         }
      }
  });

  // set up the angular mocks
  beforeEach(() => {
      // provide the personfactory
      module(($provide) => {
        $provide.factory('PersonFactory', MockPersonFactory);
      });

      // you can surround any injected dependencies with _ _ and the injector will throw them away, it's just to
      // differentiate between variables that you might want to use for tests.
      inject((_$q_, _$timeout_, _PersonFactory_) => {
         $q = _$q_;

         // having $timeout is often useful for testing that
         // promises have been fulfilled
         $timeout = _$timeout_;

         // set up sinon-as-promised, otherwise it won't work!
         sinonAsPromised($q);

         PersonFactory = _PersonFactory_;
      });
  });

  // set up your controller using mocked dependencies
  beforeEach(() => {
      controller = new PersonController($q, PersonFactory);
  });
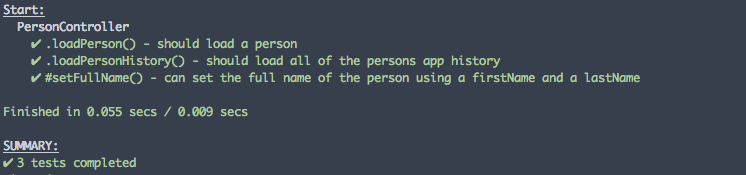
From here, you can start writing your specs and assertions for your controller using Mocha and Chai.
1
2
3
4
5
6
7
8
9
10
11
12
13
14
15
16
17
18
19
20
21
22
23
24
25
26
27
28
29
30
31
32
33
34
35
it('.loadPerson() - should load a person', () => {

    // spy on setfullname
    sinon.spy(controller, 'setFullName');

    // make sure to flush the promises
    controller.loadPerson();
    $timeout.flush();

    expect(controller.person.fullName).to.eq('John Smith');
    expect(controller.setFullName.called).to.eq(true);

    // restore setfullname
    controller.setFullName.restore();
  });

  it('.loadPersonHistory() - should load all of the persons app history', () => {

    // make sure to flush the promises
    controller.loadPerson();
    controller.loadPersonHistory().then((history) => {
      expect(history.length).to.be.greaterThan(0);
      expect(history[0]).to.eql({
        id: 1,
        text: 'John logged in.'
      }); // deep equal using chai
    });
    $timeout.flush();
  });

  it('#setFullName() - can set the full name of the person using a firstName and a lastName', () => {
    let fullName = controller.setFullName('Mary', 'Jones');
    expect(fullName).to.eq('Mary Jones');
  });
});
You may be wondering about a couple of things in this whole test suite. First of all, how am I testing promises, without AJAX calls? Secondly, what’s all this spying and stubing going on? Read on!
6. Stubbing and Spying with Sinon
The concept of stubbing and spying is very useful when it comes to unit testing in Angular. For a lot of your mocked dependencies, your controller will still need to utilise their functions during testing. Both stubbing and spying can be achieved through the Sinon library. If the content of these functions is unimportant and you are just concerned with what they return from a testing standpoint, then stubs are your best friend. A stub is just a function that does whatever you need it to for the test, and you can see two in the PersonFactory definition above:
1
2
3
4
5
6
7
8
9
10
11
12
get: sinon.stub().resolves({
  firstName: 'John',
  lastName: 'Smith'
}),
loadHistory: sinon.stub().resolves([{
  id: 1,
  text: 'John logged in.'
},
{
  id: 2,
  text: 'John added a task.'
}]);
These stubs are a little different from usual, because they are stubbing functions that return promises, but the idea is the same for normal stubs. You can chain a returns method to the end to return a normal result, and you can also have a stub that returns nothing at all! For example, if you had an error reporter in your factory that sent an AJAX request that was not necessary during testing:
1
2
3
{
  sendErrorData: sinon.stub()
}
Next up, we have spys. They are probably exactly what you think they are. They allow you to spy on different functions, which basically wraps the function in another function and provides a whole lot of helper properties that makes it easy to see whether a function has been called, how many times it has been called, the arguments it has been called with and a myriad of other data.
This is particularly useful if there are a lot of private methods in your controller that are called within the method you are testing, where you don’t care about their result in the context of the method you are testing but you still want to know that they have been called. Or, if you have a switch statement or a lot of if...else statements that can all call different functions, it is helpful to spy on those functions to see which one is called. The syntax is easy:
1
2
3
4
5
6
7
8
9
10
11
// spy on setfullname
sinon.spy(controller, 'setFullName');

controller.loadPerson();

expect(controller.setFullName.called).to.eq(true);
expect(controller.setFullName.calledWith('John', 'Smith')).to.eq(true);

// make sure you restore the method back to normal, this removes
// the spy
controller.setFullName.restore();
By default, all of your stubs are also spys, so the same helper properties are attached to them.
7. Stubbing Promises Using sinon-as-promised
To simulate promises in your tests, you’ll want to use a combination of sinon-as-promised and the $timeout service in AngularJS. Sinon-as-promised just provides more functionality to sinon in order to stub out functions that return promises. The syntax looks like this, you can tell it what to return when the promise is resolved:
1
2
3
4
get: sinon.stub().resolves(() => {
    this.firstName = 'John';
    this.lastName = 'Smith';
});
There are a couple of things to keep in mind when using sinon-as-promised. First of all, you need to set up the extra functions for sinon in each different test file. You do this by passing the Angular service $q to the sinonAsPromised() method, which is exposed by sinon-as-promised. If you don’t do this the promise functionality provided will not work correctly, and your test assertions inside the then() method will not work correctly!
Next, when you are testing the promise resolution, you need to use the Angular $timeout service to actually complete the promise. For example:
1
2
3
4
5
6
7
8
9
controller.loadPerson();
// make sure you call this to complete the promise!
$timeout.flush();

expect(controller.person.fullName).to.eq('John Smith');
expect(controller.setFullName.called).to.eq(true);

// restore setfullname
controller.setFullName.restore();
If you don’t do this, your tests will likely finish before the promise resolves, so $timeout.flush() completes all setTimeouts to resolve the promises set up by sinon-as-promised.
8. Bonus: Code Coverage Using Karma-Coverage
If you are pretty much starting from scratch writing your tests after already writing a lot of source code, or even if you are adding new features or refactoring, having a code coverage report can be really useful. A code coverage tool measures how much of your code is covered by running your unit tests, in the form of how many of your functions, branching statements and lines of code are run.
You can easily get this working with Karma with the karma-coverage preprocessor, which uses the fantastic istanbul.js to provide detailed coverage reports as a HTML output. You will just need to include karma-coverage in your project and add it as another preprocessor after the traceur preprocessor in your karma config file.
If you are like me and you store your tests alongside your source in a separate folder, then it might be a bit tricky to get the preprocessor to only run on your source files, not the test files. Thankfully, I found a GitHub issue that tells you how to do exactly this. For example this is the pattern to use for this project, to exclude the spec files in the spec subfolders:
src/**/!(*spec)/*.js
Finally, you may want to have separate Karma configs that can run with and without the coverage reporter. This is because Istanbul will thoroughly destroy your readable code, even with source maps, so it is not really possible to debug your tests while running with karma-coverage enabled.
Conclusion
I hope this gives you a good overview of where to get started with unit testing in Angular applications with Karma. I’ve covered how you can compile your ES6 modules using Karma, mocking your own dependencies and injecting Angular dependencies, and spying and stubbing with Sinon.
In the next article I hope to write an explanation of how you can unit test directives. This is a little trickier because it involves the compilation of HTML and creating your own injected $scope, but once you’ve done it once it is easy to modify it for each test you need to write. Now get testing!